


Mobile RV Solar Installation for Your Rig
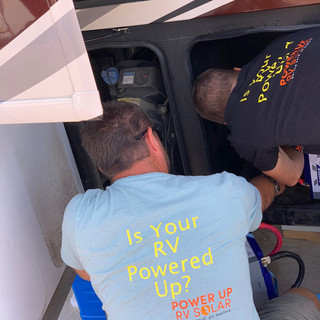
The difference between a solar-equipped RV and an RV that can truly stay off-grid usually shows up around dinner time. The air conditioner is running, the microwave gets used, laptops need charging, and the battery monitor starts telling the truth. A mobile RV solar installation should be designed for those real-world moments, not just for a panel count printed on a package.
For some travelers, solar means keeping the refrigerator, lights, water pump, and phones running through a long weekend. For others, it means working remotely from public land, running residential refrigeration, or reducing generator time while keeping a coach comfortable. The right system starts with how you travel and what you expect your rig to do when shore power is nowhere nearby.
Start With Your Actual Power Needs
Solar panels make energy during daylight, but the battery bank delivers power when clouds roll in, the sun goes down, or a heavy appliance starts. That is why system design cannot begin and end with roof space. Your appliances, battery capacity, inverter size, charging sources, and camping habits all have to work together.
A small travel trailer used for weekend dry camping may need a very different setup than a diesel pusher occupied full-time by two remote workers. A van with a compressor fridge, induction cooktop, and cellular equipment has its own set of demands. The question is not, “How much solar can fit on the roof?” It is, “What do you need to run, for how long, and under what conditions?”
The most useful planning conversation includes the major loads: air conditioners, microwave, coffee maker, refrigerator, TV, computer equipment, water heater, fans, and any medical or work-related equipment. Even an appliance used briefly can shape the installation. A high-wattage microwave or hair dryer may require a larger inverter and heavier cabling, while overnight refrigeration and CPAP use place more emphasis on usable battery capacity.
Air Conditioning Changes the Conversation
Air conditioning is often the biggest dividing line in RV solar planning. Running one AC unit for a short period is very different from expecting to cool the rig for hours through a hot Arizona afternoon. It can be done in certain configurations, but it requires an honest look at battery capacity, inverter output, solar harvest, weather, insulation, and how much runtime you actually need.
A soft start can reduce the surge required when an air conditioner starts, which may make the unit more compatible with an inverter or generator. It does not make the air conditioner a low-power appliance. If AC operation is part of your off-grid plan, it should be discussed early so the electrical system is built around that goal instead of patched together later.
What a Mobile RV Solar Installation Includes
A complete solar system is more than panels mounted to a roof. Panels capture available sunlight, but the balance of the system determines how efficiently that energy is stored, delivered, and monitored.
Lithium battery banks are a popular choice because they provide substantial usable capacity, recharge efficiently, and handle RV use well when properly integrated. The battery bank needs to be matched with an appropriate solar charge controller, safe overcurrent protection, correctly sized wire, disconnects, and a charging profile that supports the battery manufacturer’s specifications.
The inverter is the heart of AC power away from hookups. It converts battery power into the 120-volt electricity used by outlets and many household-style appliances. Inverter sizing depends on both continuous loads and startup demands. Choosing an oversized inverter without enough battery capacity can be just as frustrating as choosing an inverter that cannot support the appliances you want to use.
Shore-power integration matters, too. A well-designed system should charge and operate correctly when you plug into a campground pedestal, while protecting the electrical components and making daily use simple. Many owners also benefit from alternator charging, which uses the tow vehicle or motorhome engine to replenish the battery bank while traveling. That can be especially valuable during cloudy stretches, winter travel, or frequent moves between campsites.
Remote monitoring ties the system together. A clear view of battery state of charge, solar production, charging input, and power consumption helps you make confident decisions without guessing. You should not have to open compartments and inspect cables every time you want to know whether the system is keeping up.
Roof Space Is Only One Design Constraint
Roof layout matters. Air conditioners, vents, antennas, skylights, satellite equipment, and curved surfaces all affect panel placement. So do shadows from roof accessories. A single shaded panel can reduce output depending on how the array is configured, which is why thoughtful layout is worth more than simply filling every open square foot.
Not every RV benefits from the largest possible roof array. If your rig spends most nights in wooded campgrounds, a larger battery bank, alternator charging, or generator integration may provide more practical value than adding another panel. If you regularly camp in open desert, maximizing solar harvest may be the right move.
There are trade-offs in every build. More solar can shorten recharge time, but it cannot create energy after sunset. More battery capacity provides longer runtime, but it adds cost and must be charged back up. A generator remains useful for extended cloud cover, heavy air-conditioning demand, or high-draw days. The goal is not to eliminate every backup option. The goal is to build a system that supports the way you actually travel.
Clean Installation Work Is Part of Reliability
A powerful system is only as dependable as its installation. Electrical connections, fusing, cable routing, ventilation requirements, component mounting, and access for future service are not cosmetic details. They affect safety, performance, and how easily the system can be maintained on the road.
A neat installation makes it easier to trace circuits, identify disconnects, inspect connections, and add equipment later. It also avoids the common problem of crowded battery compartments and loosely routed cables that make troubleshooting difficult. Professional workmanship means planning the equipment locations before drilling, protecting wires where they pass through structure, and leaving the owner with an understandable system rather than a mystery behind cabinet panels.
This is especially important for upgrades. Many RV owners already have factory solar, an older lead-acid battery bank, or an inverter that no longer matches their needs. Some existing equipment can be integrated. Other times, retaining one weak component limits the performance of everything around it. An inspection of the current setup helps determine whether an upgrade can be staged or whether a fresh electrical foundation makes more sense.
Plan Around How You Camp
Before scheduling work, think through your normal travel pattern. Do you move every day or settle into one location for a week? Do you camp primarily in sunny open areas, forested parks, RV resorts, or a mix? Are you trying to reduce generator use, support remote work, run an AC unit, or simply stop worrying about dead batteries overnight?
Your timeline and budget matter as much as your equipment wish list. A staged plan can be smart when it is designed correctly from the beginning. For example, installing a properly sized inverter, wiring paths, and battery infrastructure now may allow future battery or solar expansion without redoing the entire project. But staging only works when the initial components are chosen with the final goal in mind.
Power Up RV Solar approaches mobile installations through that requirements-first lens. A consultation that covers rig type, appliance loads, existing equipment, preferred camping style, and desired runtime produces a more useful answer than a generic package ever can. Whether installation is scheduled at a service location or arranged along a travel route, the target is the same: a clean, efficient system built for your road ahead.
Questions Worth Answering Before Installation
Bring real details to the planning process. Know how many air conditioners you have, the wattage of high-draw appliances, the age and type of your existing batteries, and whether you need to power equipment while driving. If you work from the road, include monitors, routers, Starlink equipment, printers, and any tools that run for long periods.
It also helps to define what success looks like. Maybe success is three quiet nights without hookups. Maybe it is charging lithium batteries while traveling between boondocking spots. Maybe it is enough capacity to run the microwave, coffee maker, and entertainment system without starting a generator. Clear expectations lead to better component choices and fewer surprises after installation.
The best mobile RV solar installation is not necessarily the one with the most panels, the largest inverter, or the biggest battery bank. It is the one that makes your preferred kind of travel easier. Build around the places you want to park, the comfort you want to keep, and the freedom you want when the nearest hookup is miles away.
Comments