


Alternator Charging for RV Lithium Done Right
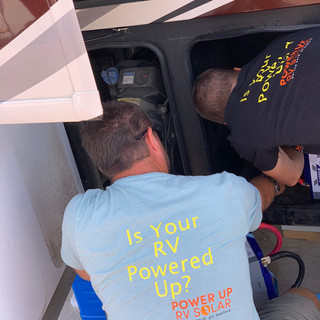
A long driving day should do more than move your RV to the next trailhead, family visit, or boondocking spot. With alternator charging for RV lithium designed correctly, the miles can put meaningful energy back into your house battery bank. Designed poorly, that same connection can overwork an alternator, overheat undersized wiring, or leave an expensive lithium bank charging far below its potential.
The key is to treat alternator charging as part of the complete electrical system, not as a simple battery-to-battery cable. Your engine, chassis electrical system, house batteries, solar array, inverter, and actual camping habits all affect the right answer.
Why RV lithium batteries change the alternator conversation
Lead-acid house batteries naturally slow their charge acceptance as they fill. Lithium batteries do not behave the same way. A lithium bank can accept a high charging current for a much longer portion of its charge cycle, which is excellent when the charging source is built for it.
A factory-installed isolator, relay, or small charge wire was often intended to maintain a lead-acid battery during travel. It may work acceptably with modest loads, but it is rarely the right foundation for a larger lithium battery bank. Lithium can pull hard enough to create heat in long cable runs, connectors, fuses, and the alternator itself.
That does not mean lithium and alternators are a bad match. It means the system needs a controlled charging path. For many motorhomes and towable RVs, a properly selected DC-DC charger is the dependable answer.
Use a DC-DC charger, not a direct connection
A DC-DC charger takes power from the engine-side electrical system and delivers a controlled charge profile to the RV lithium battery bank. It limits the current draw to a level the alternator and wiring can support, boosts or regulates voltage when necessary, and charges the lithium bank using settings appropriate for its battery management system.
This matters because alternator voltage is not always a steady, lithium-friendly charging voltage. Newer vehicles may use smart alternators that reduce output based on vehicle demand or fuel-saving strategies. A direct connection can leave the house bank undercharged, even after hours on the road. A DC-DC charger can continue providing the voltage and current your lithium battery expects, as long as the chassis side has sufficient input power.
The charger also provides useful separation between the chassis and house systems. That reduces the chance of the house bank draining the starting battery when the engine is off. Most quality installations include ignition-triggered operation or voltage sensing so charging starts only when it should.
Charger size should follow the whole system
A bigger charger is not automatically better. A 20-amp, 30-amp, 40-amp, or higher-output DC-DC charger must be chosen around more than battery capacity. We look at alternator capability, factory chassis loads, cable length, wire size, battery bank limits, and how much energy you actually need to replace while driving.
For example, a traveler with a modest lithium bank, compressor refrigerator, and solar may only need a moderate alternator charging rate to cover travel-day use. A full-time RVer running an inverter for work equipment, residential refrigeration, or other steady loads may benefit from more charging capacity. But that increase only makes sense if the alternator, fuse protection, connections, and cable routing can handle it safely.
If your battery manufacturer specifies a maximum recommended charge current, that matters too. The battery management system may shut down charging to protect the cells if limits are exceeded, but system design should not rely on that safety shutdown as normal operation.
Wiring is where many installations succeed or fail
High-current 12-volt charging is unforgiving of voltage drop. A cable run that seems manageable on paper can lose too much voltage over the distance between the engine compartment and a rear-mounted battery bank. That lost voltage becomes heat and reduced charging performance.
Proper alternator charging for RV lithium starts with correctly sized copper cable, secure lugs, abrasion protection, and routing away from exhaust heat, moving parts, and sharp metal edges. Both ends of the cable need properly sized overcurrent protection located close to their power sources. A fuse is there to protect the wire if a fault occurs, not to compensate for wire that is too small.
Grounding deserves the same attention as the positive cable. Depending on the RV and charging design, the system may use a dedicated negative return cable, an approved chassis return path, or a combination designed around the equipment manufacturer’s requirements. A weak or corroded ground can create confusing charging problems that look like a bad charger or bad battery.
Neat workmanship is not just cosmetic here. Accessible fuses, labeled circuits, protected cable runs, and properly crimped terminations make a system safer to troubleshoot years down the road. That matters when your RV is far from hookups and you need dependable power, not a mystery behind a panel.
How much charging can you expect while driving?
Start with a simple energy question: how many amp-hours do you expect to use between destinations? If you consume 150 amp-hours overnight and drive four hours the next day, a 30-amp DC-DC charger may return roughly 120 amp-hours under favorable conditions. Real-world output can be lower because of charger efficiency, battery state of charge, chassis voltage, heat, and the vehicle’s electrical demand.
That estimate is still useful. It helps separate a charger that supports your travel routine from one that merely maintains the bank.
Solar changes the equation. On bright travel days, roof solar may contribute significantly while you drive, especially if the RV is not shaded by trees, fuel canopies, or storm clouds. Alternator charging is then a strong backup and a way to recover energy during cloudy stretches. On the other hand, a winter trip, dense forest camping, or repeated travel days with little sun can make alternator charging a central part of the energy plan.
The best setup often uses both. Solar quietly harvests energy whenever conditions allow, while the DC-DC charger gives you predictable charging during travel. Shore power remains another valuable source when hookups are available and you want a full recharge before heading back out.
Watch for these signs your current setup needs attention
A factory charge line may be enough for small maintenance charging, but it is worth evaluating if you notice any of the following:
Your lithium bank barely gains charge after several hours of driving.
A relay, connector, fuse holder, or cable feels unusually warm during charging.
Your battery monitor shows unstable charging current or low voltage at the battery.
Your engine or chassis system behaves differently after installing a larger lithium bank.
You rely on a generator more often than expected despite driving regularly.
These symptoms do not always point to one issue. They can come from voltage drop, a smart alternator, weak connections, an undersized charge path, incorrect charger settings, or simply a mismatch between energy use and charging capacity. That is why guessing from battery size alone often leads to disappointing results.
Plan around how you actually travel
An RV that moves every few days needs a different alternator charging strategy than one parked off-grid for two weeks. A motorhome with a high-output alternator has different options than a travel trailer drawing from a tow vehicle. The inverter size, refrigerator type, air conditioner goals, microwave use, remote-work equipment, and battery capacity all belong in the same design conversation.
Before selecting equipment, write down your battery bank voltage and capacity, the make and model of the RV or tow vehicle, estimated alternator output if known, typical driving hours, and your largest daily electrical loads. Also consider where the battery bank sits relative to the engine or tow vehicle. Distance has a direct effect on cable sizing and practical charge rates.
Power Up RV Solar approaches these upgrades as part of a custom energy plan. The goal is not simply to add another charger. It is to build a charging system that supports the way you camp, keeps the installation clean and serviceable, and gives you a realistic path toward more time away from hookups.
When the route ahead includes long stretches of open road, alternator charging should be working in the background - safely turning travel time into the energy that helps you stay out longer once you arrive.


Comments