


RV Inverter Installation That Fits Your Rig
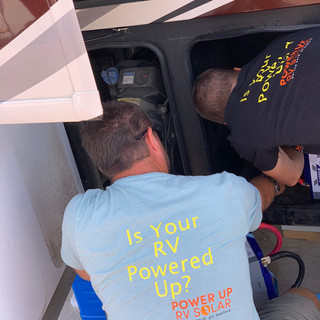
A microwave that runs without firing up a generator. A laptop charged at a quiet campsite. Air conditioning that is possible because the system was designed for the load, not because someone promised a generic package would work. That is what a properly planned RV inverter installation can change.
An inverter is often described as the part that turns battery power into household power. True, but incomplete. In a real RV electrical system, the inverter affects battery capacity, cable sizing, charging strategy, solar input, shore-power behavior, circuit protection, and what you can comfortably run when you are away from hookups. The best installation starts with how you travel, not with a wattage number on a box.
Start With the Loads You Actually Plan to Use
The right inverter is sized around the appliances you expect to run, especially the ones that pull the most power. For some RV owners, that means a coffee maker, television, residential refrigerator, and work equipment. For others, the goal is running a microwave or supporting one or more air conditioners while boondocking.
A microwave may be labeled at 1,000 watts of cooking power but draw substantially more from the inverter. An air conditioner has a high startup demand, even if its running wattage is manageable. Induction cooktops, hair dryers, electric kettles, and space heaters also create heavy draws. Those loads do not automatically mean you need the largest inverter available. They mean the whole system needs to be designed around realistic use.
Start by writing down the appliances you want to operate at the same time. Then consider how long you expect to run them. A 3,000-watt inverter may handle many common RV loads well, but it cannot create battery energy. If the battery bank is too small, or the cables and protection are not built for the current involved, the system will not deliver the experience you expected.
This is where camping style matters. A weekend camper who spends most nights on shore power has different needs than a full-time RVer working remotely from public land. If you move often, alternator charging and solar recovery may carry much of the load. If you stay in one place for several days, battery capacity and solar production become more significant.
Choose an Inverter That Works With Your Charging Plan
Most complete off-grid systems use an inverter/charger rather than an inverter alone. It powers selected AC circuits from the battery bank when shore power is unavailable, then charges the batteries when you plug into shore power or run a generator. It can also pass shore power through to those circuits when an external source is present.
That integration is useful, but it needs to be set up correctly. Lithium batteries have different charging requirements than lead-acid batteries. Charge rates, voltage limits, temperature protections, and battery communication all deserve attention. A quality lithium bank paired with a properly configured inverter/charger can recharge efficiently and deliver strong performance, but only if the components are compatible and programmed for each other.
Solar belongs in this conversation, too. Solar panels replace energy over time. Batteries store energy for use now. The inverter makes that stored energy useful for AC appliances. Each piece has a distinct job, and an imbalance in one area can limit the entire setup. A large inverter with minimal battery storage will not support long high-load use. A large battery bank without enough charging input may take too long to recover after a cloudy day or a heavy night of use.
RV Inverter Installation Is More Than Mounting a Box
A neat RV inverter installation begins with location. The inverter should be close enough to the batteries to keep high-current DC cable runs short, while still allowing safe access, ventilation, serviceability, and protection from moisture. It also needs a solid mounting surface and room for the large cables, fuses, disconnects, and distribution equipment that belong with it.
At 12 volts, an inverter can draw a surprising amount of current. A 3,000-watt inverter operating near full output can pull well over 250 amps from the battery bank after accounting for real-world losses. That is why undersized cables, loose lugs, poor crimping, and improvised connections are not minor details. They can cause voltage drop, nuisance shutdowns, heat, damaged equipment, or fire risk.
Professional workmanship should be visible before you ever turn the system on. Cables should be properly sized and routed, terminals should be protected, fuses and disconnects should be accessible, and wiring should be labeled so future service does not turn into a guessing game. Clean work is not just about appearance. It makes troubleshooting easier and helps the system stay dependable over thousands of travel miles.
Protect the DC Side
The battery-to-inverter connection needs overcurrent protection sized for the cable and equipment, along with a properly rated disconnect. The battery bank should also have a battery monitor that tracks state of charge, current flow, and power use. Voltage alone does not tell the full story, particularly with lithium batteries.
Battery monitoring changes how you camp. Instead of wondering whether your batteries are “probably fine,” you can see what the inverter is drawing, how much solar is coming in, and whether your energy habits match your available capacity. Remote monitoring can be especially useful for RVers who want to check system status from inside the coach or while away from it.
Plan the AC Side Carefully
Not every outlet or appliance in an RV needs to be powered by the inverter. In many builds, only selected circuits are moved to an inverter-backed subpanel. This might include kitchen outlets, entertainment equipment, refrigerator power, workstations, and other everyday loads. High-demand appliances may be included when the battery bank and inverter are designed to support them.
Separating circuits gives you more control. It also prevents an inverter from trying to feed loads you did not intend to run from battery power. The correct approach depends on the RV's existing electrical layout and your goals. Some owners want simple convenience circuits. Others want a more capable whole-coach setup with managed loads and air-conditioning support.
Do Not Ignore Shore Power and Generator Behavior
An inverter system has to coexist safely with shore power and any onboard generator. The transfer function must prevent power sources from feeding back into each other, and the charging settings must respect the limits of the shore connection. A system that charges aggressively may need to be adjusted when plugged into a lower-amp service so it does not overload the pedestal.
This is also why a site assessment matters. Existing converter wiring, transfer switches, breaker panels, battery locations, and prior modifications can change the scope of an installation. Older RVs may need more careful integration than newer rigs, especially if there are undocumented additions from previous owners.
If you want air conditioning from battery power, the details become even more specific. The air conditioner model, startup behavior, number of units, expected runtime, battery voltage, inverter capacity, and solar recovery all matter. Soft-start equipment can reduce startup demand, but it does not eliminate the energy required to run an air conditioner over time. Comfort off-grid is possible, but it should be planned honestly.
Build for the Trips You Want to Take
The most useful question is not, “What inverter should I buy?” It is, “What do I want my RV to do when I am not plugged in?” Your answer may be quiet mornings with coffee and a microwave, productive workdays away from crowded parks, or the freedom to camp farther from hookups without giving up the essentials.
Before scheduling an installation, gather the details that shape the design: your RV type and year, existing battery setup, major appliances, air conditioner model, typical travel regions, expected time off-grid, and whether you want to add solar or upgrade later. A requirements-first conversation prevents expensive mismatches and gives you a system that supports how you actually camp.
At Power Up RV Solar, that planning is part of the work. A system should feel organized and dependable from the battery compartment to the breaker panel, whether it is installed in Harrison, Michigan, Yuma, Arizona, or Summerville, South Carolina.
The right inverter setup is not about chasing the biggest number. It is about knowing that when you pull into a quiet spot, the power system is ready for the way you chose to travel.


Comments