

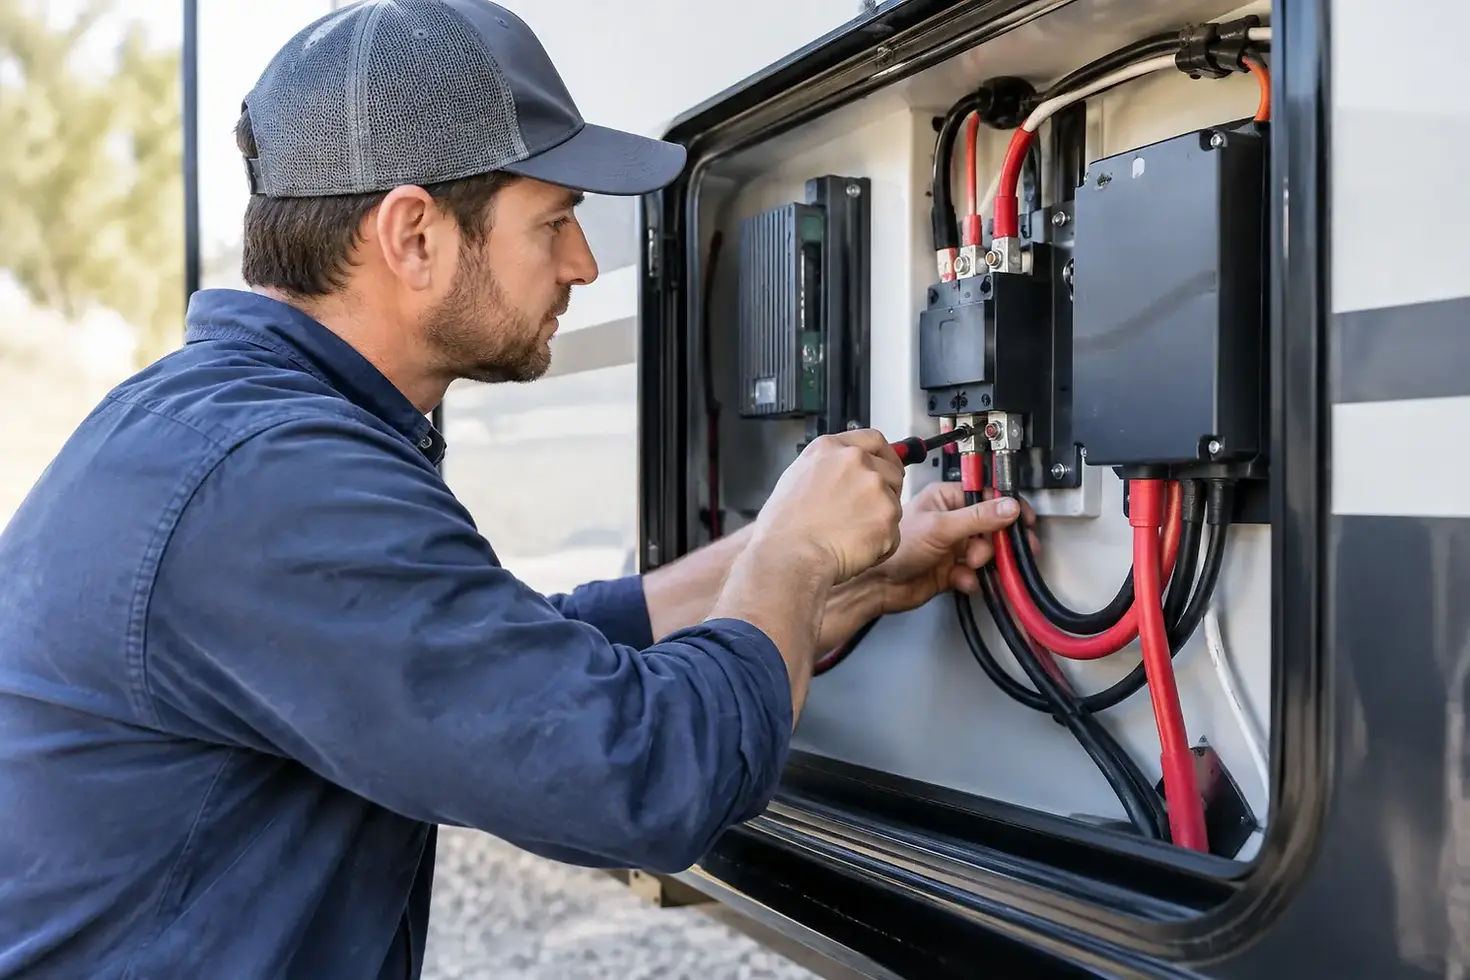
How to Connect an RV Inverter Transfer Switch
A transfer switch is what makes an RV inverter feel like part of the coach instead of a separate appliance. To connect an RV inverter transfer switch correctly, you need to know exactly which power sources it will manage, which circuits the inverter should supply, and how your existing shore-power system is wired.
That last part matters. A neat inverter installation can let you run selected outlets, refrigeration, entertainment equipment, and other everyday loads from your battery bank. A poorly planned one can create nuisance trips, drain batteries faster than expected, or introduce a serious AC wiring hazard. The goal is not simply to make power appear at an outlet. The goal is dependable power that behaves correctly whether you are plugged in, running a generator, or camped well beyond hookups.
What an RV inverter transfer switch does
An inverter changes battery DC power into household-style AC power. A transfer switch chooses which AC source feeds a circuit or subpanel. In most RV applications, it selects between shore or generator power and inverter power.
When shore power is available, the transfer switch passes that incoming power to the designated loads. When shore power goes away, the switch shifts those loads to inverter output, assuming the inverter is turned on and the battery bank has adequate charge. Many inverter-chargers include an internal transfer switch, while standalone inverters usually require an external switch or a purpose-built inverter subpanel.
The key safety feature is break-before-make switching. Shore power and inverter power must never be tied together. The transfer equipment must disconnect one source before connecting the other. Backfeeding power into a pedestal, generator, or inverter output can damage equipment and create a dangerous shock or fire risk.
Start with the system design, not the wire
Before choosing a transfer switch location or opening an electrical panel, define the loads that will run from the inverter. This is where a custom RV electrical plan pays off.
A modest setup may power receptacles, TV equipment, Starlink or a cellular router, CPAP equipment, and a residential-style refrigerator. A larger lithium battery bank, substantial inverter, and properly designed charging system may support higher-demand equipment for limited periods. Air conditioning, electric water heating, space heaters, and electric cooking loads change the design significantly. They are not impossible to support, but they require honest runtime expectations and a system sized for the demand.
Your camping style also matters. A weekend traveler who mostly stays in campgrounds has different needs than a full-time RVer working remotely on public land. Consider how often you use shore power, whether you carry a generator, how long you want to stay off-grid, and which appliances need to work without any extra setup.
Decide between an inverter subpanel and whole-coach coverage
For many RVs, the cleanest approach is an inverter subpanel. The main distribution panel continues to receive shore or generator power, while selected branch circuits move to the inverter subpanel. The inverter transfer switch then manages power for those specific circuits.
This approach keeps high-demand loads off the inverter unless they are intentionally included. It also makes the system easier to understand when troubleshooting. You know which circuits are inverter-backed and which require shore power or a generator.
Whole-coach inverter coverage can be appropriate in certain larger systems, especially when the inverter and battery bank are designed around the complete electrical load. But it demands more planning. You must account for every branch circuit, converter or charger behavior, air conditioner loads, neutral and ground configuration, and the inverter’s pass-through rating. Bigger coverage is not automatically better if it creates unnecessary battery draw or complicates safe operation.
Choose equipment that matches the RV electrical system
Transfer switches are not interchangeable. The switch must match the voltage, frequency, amperage, and wiring configuration of the circuits it serves. Most North American RV branch circuits are 120V AC, but service configurations vary. A 30-amp coach and a 50-amp coach have different incoming power arrangements, and a 50-amp coach may use two 120V legs.
The inverter also needs to match the job. A 2,000-watt inverter may be plenty for normal outlets and electronics, while a 3,000-watt or larger inverter can support more demanding loads. Wattage alone does not tell the whole story. Surge capacity, charger output, pass-through capability, battery voltage, battery bank capacity, cable sizing, and available solar charging all work together.
If the inverter includes a built-in transfer switch, confirm its transfer rating and manufacturer instructions before designing the AC side. Some units are meant to feed a dedicated subpanel. Others can support broader distribution arrangements when installed correctly. Do not assume an internal switch eliminates the need for proper overcurrent protection, circuit separation, or code-compliant wiring practices.
How to connect an RV inverter transfer switch safely
AC wiring in an RV can be hazardous even when the coach is unplugged. Batteries, solar charging equipment, generators, and stored electrical energy can keep parts of the system live. If you are not trained and equipped to verify de-energized conductors, this is a professional installation job.
At a high level, the connection path is straightforward: shore or generator power feeds the transfer switch input, inverter AC output feeds the alternate input, and the transfer switch output feeds the selected circuits or inverter subpanel. The correct terminals, conductor sizes, breakers, and neutral handling depend on the specific equipment and RV layout.
A qualified installer will first isolate every energy source. That means disconnecting shore power, shutting down the generator, disabling the inverter, disconnecting battery power as required by the equipment instructions, and covering or disconnecting solar input where appropriate. They verify the system is dead with a properly rated meter rather than relying on a switch position or indicator light.
Next, they identify the existing panel, branch circuits, and cable routes. In many coaches, the best transfer switch location is close enough to the main panel and inverter subpanel to keep AC wiring organized, while remaining accessible for service. The inverter itself should be close to the battery bank to minimize voltage drop on the high-current DC cables, provided ventilation, clearance, and manufacturer requirements are met.
The incoming AC source is protected by the appropriate breaker before it reaches the transfer equipment. The inverter output is likewise protected according to the inverter manufacturer’s requirements. The transfer switch output then feeds the selected distribution panel or circuits. Every conductor must be properly supported, protected from abrasion, labeled, and terminated to the correct torque specification.
Neutral and ground are where mistakes happen
Neutral-ground bonding is one of the most misunderstood parts of an RV inverter installation. In a typical RV, the neutral and ground are kept separate in the distribution panel. The shore pedestal or generator source handles the appropriate bond. Some inverters switch the neutral internally; some require a transfer switch that switches the neutral; and some have specific bonding relay behavior.
The correct answer depends on the inverter, generator, and transfer equipment instructions. Never add a neutral-ground bond in the RV panel just because it seems logical. An incorrect bond can cause GFCI problems, energize metal components under fault conditions, or create a shock hazard.
This is also why a transfer switch should not be selected based only on amp rating. Its pole configuration and neutral-switching behavior must suit the system. A professional installer reviews the manuals for every major component, not just the transfer switch label.
Test the system in every operating mode
A transfer switch installation is not finished when the lights come on. It needs functional testing with shore power, inverter power, and generator power if the RV has one.
First, verify that shore power passes to the designated circuits and that the inverter charger behaves as expected. Then disconnect shore power and confirm that the inverter takes over without feeding power back toward the inlet. Test the intended outlets and appliances under realistic loads while watching battery voltage and inverter demand.
If a generator is part of the system, test that mode separately. Confirm transfer timing, verify that GFCI-protected circuits operate correctly, and make sure the inverter does not try to charge from an unintended source. Check for fault codes, unusual heat, loose connections, and voltage drop under load.
A remote monitoring system can make this much easier after installation. Seeing battery state of charge, inverter load, solar production, and charging input helps you understand how the system performs during an actual travel day rather than guessing from a single test.
Common planning mistakes to avoid
The most common mistake is putting too many loads on the inverter without matching the battery bank and charging capacity to the expected use. The second is treating AC wiring as an add-on rather than part of the complete energy system. Your solar array, lithium batteries, inverter, shore charging, generator integration, and appliance loads need to be designed as one working system.
Another frequent issue is forgetting about the RV converter. If it remains on an inverter-backed circuit, the inverter may power the converter while the converter tries to charge the batteries. That wastes energy and can create confusing behavior. A properly planned subpanel arrangement usually prevents this loop.
A clean, labeled installation earns its value months later, when you need to isolate a circuit, inspect a connection, or explain the system to the next owner. The best off-grid electrical systems disappear into the background until you pull into a quiet site, make coffee, keep the refrigerator cold, and stay comfortably connected without hunting for a hookup.


Comments